Install Java Runtime Environment (JRE) on Xubuntu 12.10
This tutorial will guide you to the process of install Java Runtime Environment (JRE) on Xubuntu 12.10 system. The latest version of Oracle Java JRE can be obtained here. This tutorial will install Java on system and also create symbolic link java library. In other word, we will also enable the Java plugin for Mozilla Firefox, Google Chrome and other web browser under Xubuntu 12.10. I am sorry but I am no the fan of OpenJDK JRE. I think Oracle Java is better than OpenJDK. :)
OK. Lets get started.
First, use this link to download the latest available Java package for your computer (32 bit or 64 bit). In this tutorial, I am using the jre 7 update 9 for Linux 32 bit (tar.gz). Save the file jre-7u9-linux-i586.tar.gz to your computer.
Next, extract the file using command. Change the command if you have newer or any other java version.
It will create a directory called jre1.7.0_09. Now move the folder to /usr/ directory
OK, now execute this command to install java.
Next, extract the file using command. Change the command if you have newer or any other java version.
tar xzvf jre-7u9-linux-i586.tar.gz
It will create a directory called jre1.7.0_09. Now move the folder to /usr/ directory
sudo mv jre1.7.0_09 /usr/javaNote: I rename the folder to java for easier use.
OK, now execute this command to install java.
cd /usr/javaNow check if java correctly installed
sudo ln -s bin/java /usr/bin/java
java -versionIt should returned similar to this one
xubuntu@xubuntu:/usr/java$ java -version
java version "1.7.0_09"
Java(TM) SE Runtime Environment (build 1.7.0_09-b05)
Java HotSpot(TM) Server VM (build 23.5-b02, mixed mode)
OK at this point, Java is well installed. Now we need to enable the java plugin for web browser.
Still in Terminal, type the following commands. (xubuntu is my username)
cd /home/xubuntu/.mozilla
mkdir plugins
cd plugins
ln -s /usr/java/lib/i386/libnpjp2.so
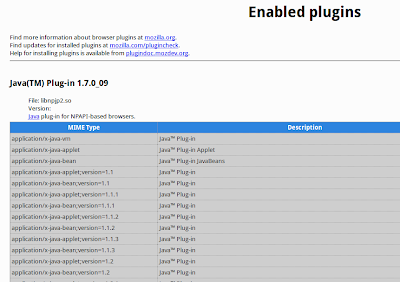
OK that's it. Now check if java web plugins is enabled. Type about:plugins on Firefox and you should get similar to this one
